In this article, I would like to share how to perform Database performance testing using the JMeter tool.
Why database performance testing is crucial?
Database performance testing is really important because it helps make sure that databases work well and fast. It checks if the database can handle lots of users and data without getting slow or crashing. This testing helps find any problems, like if the database uses too much of the computer’s resources or if it’s not responding quickly. By fixing these issues, developers make sure that the database works smoothly, which means happier users and lower costs for running the database.
Overview of JMeter: A tool for performance testing:
Apache JMeter is a widely used open-source tool for performance testing, mainly for web applications. It simulates heavy loads on servers to test their performance under different conditions, helping identify bottlenecks. It supports various protocols, has a user-friendly GUI for creating test plans, and offers flexible scripting options for advanced users. JMeter’s assertions feature allows testers to verify the correctness of server responses. Overall, it’s a versatile tool for ensuring the reliability and scalability of software systems.
Database Performance testing
Before diving into the procedural steps, it is essential to confirm the presence of the following prerequisites:
Database: Choose a database that suits the needs of your project.
Database Credentials: Verify that you possess the credentials to access the selected database.
JMeter Installation: Confirm the successful installation of JMeter on your machine.
Step 1: Launch JMeter
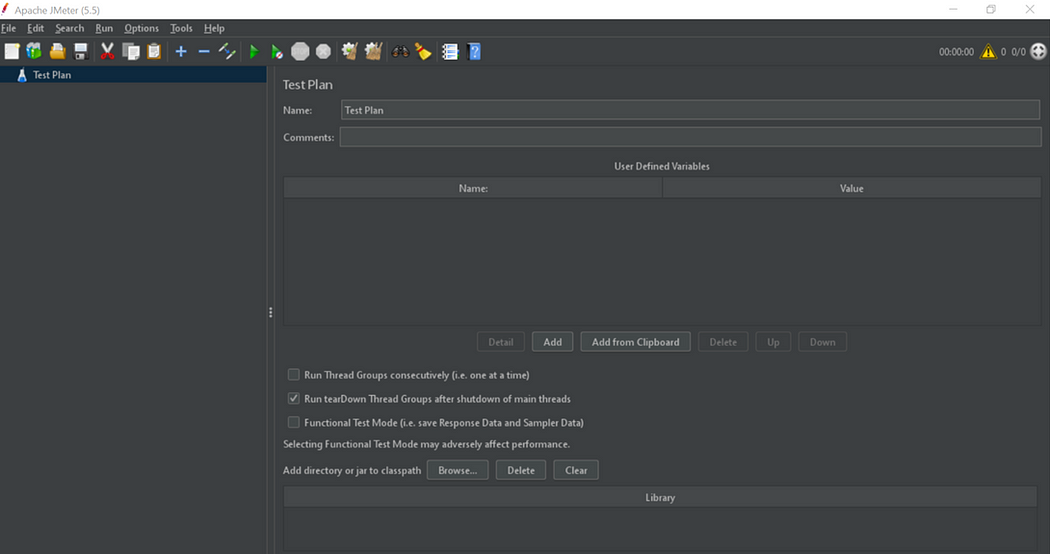
You can run JMeter using the “jmeter.bat” file in the “bin” folder. Here is a screenshot of JMeter GUI:
Step 2: Add Thread group to your Test Plan
Right-click on the Test plan > Click Add > Click Threads > Select Thread Group
Step 3: Setup Thread Group
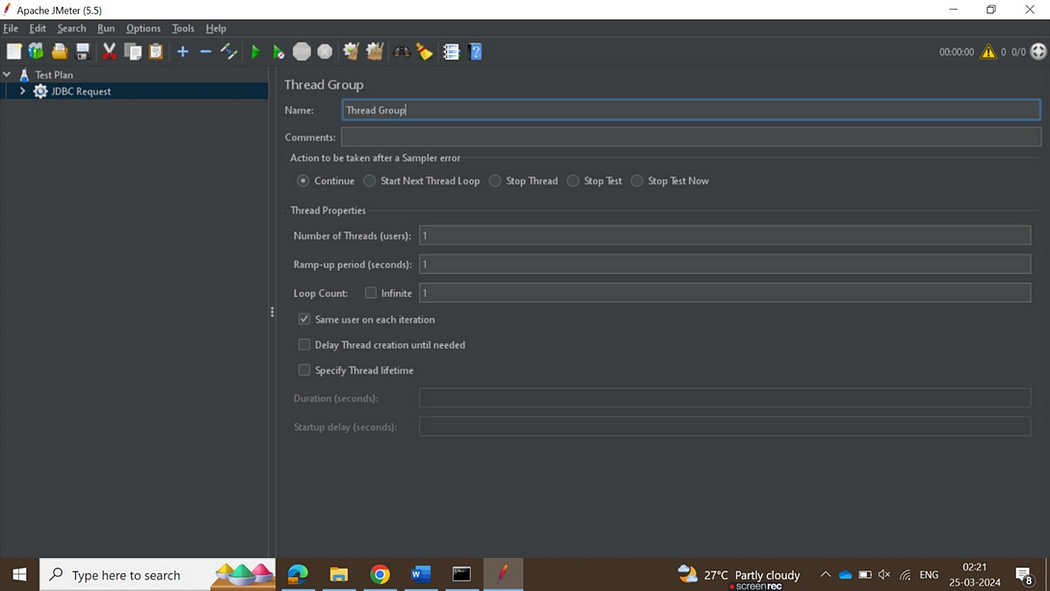
Specify essential fields in the Thread group for performance testing:
Number of Threads: Specifies the threads used in the load test.
Ramp-Up Period: Sets the time to activate all threads. With 10 threads and a 30s ramp-up, one thread starts every 3s, reaching 10 threads in 30s.
Loop Count: Determines test executions. Choosing Infinite means the test runs until manually stopped.
Step 4: Install JDBC driver server
Download the JDBC driver and install it in the Jmeter “lib” folder.
Go to Thread group, Browser the JDBC driver file and add it to the “Add directory or jar to classpath”
Step 5: Add JDBC Config Element for Jmeter
Right-click on Test plan > Add > Config Elements > JDBC Connection Configuration
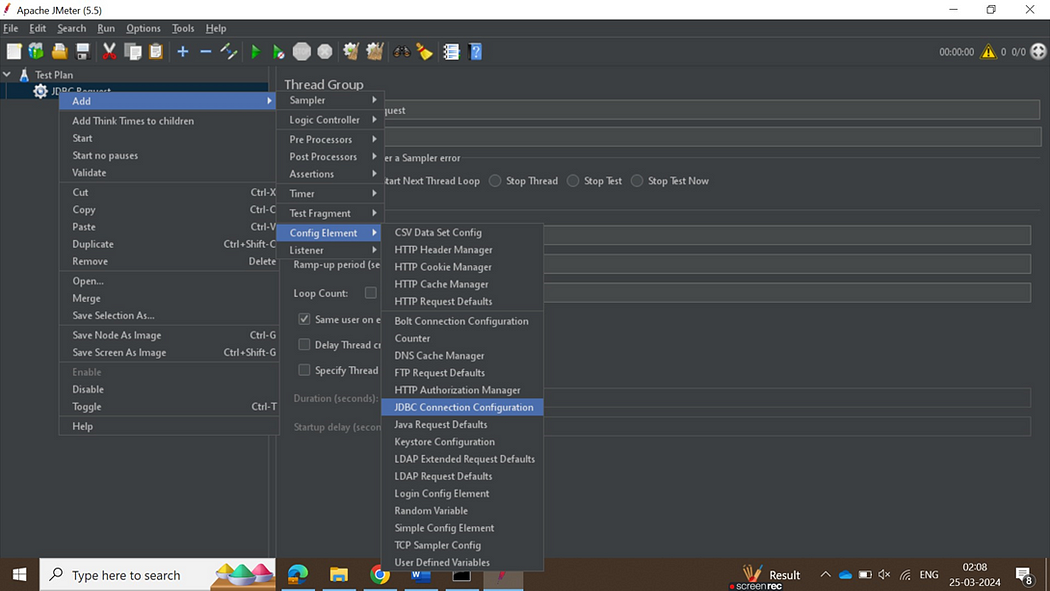
Prepare the Database Connection Configuration as follows:
Variable name for created pool: give any name
Database URL: jdbc:sqlserver://ServerName;DatabaseName=your databasename;encrypt=true;trustServerCertificate=true
JDBC Driver Class: Select the appropriate driver class from the dropdown menu corresponding to your Database.
Username and Password: Enter valid credentials for your database.

Step 6: Create JDBC Request
Right-click on Test plan > Add->Sampler->JDBC Request
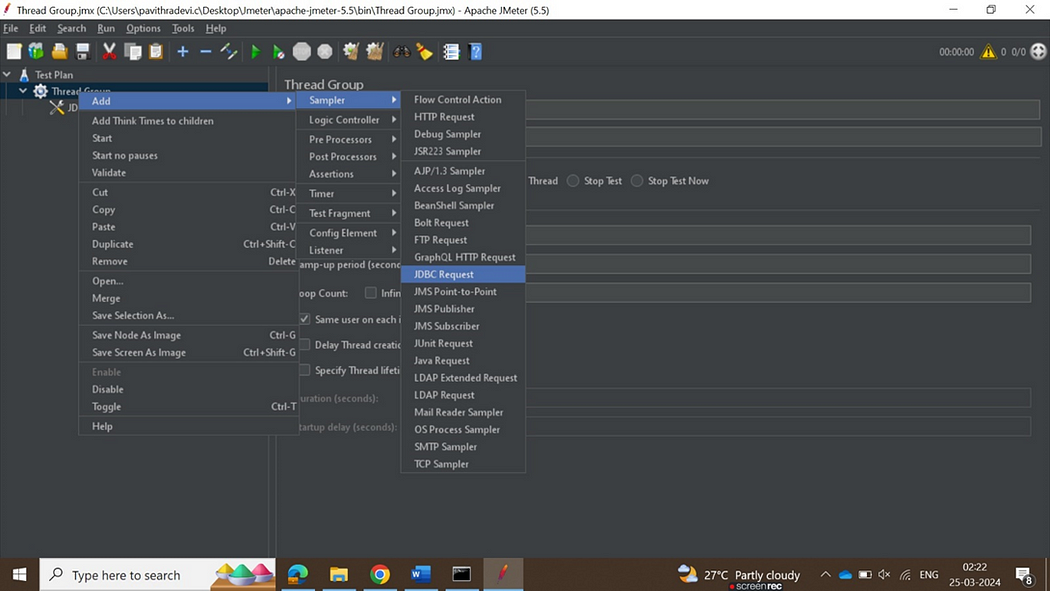
Enter the Variable name created in the JDBC connection configuration to establish a connection between the configuration and the request.
Select the Query type from the dropdown and write the SQL Query.

Step 7: Add Listeners
Right-click on Test plan > Add > listener
View Results Tree: Shows detailed information of sampler requests in a tree format for debugging.
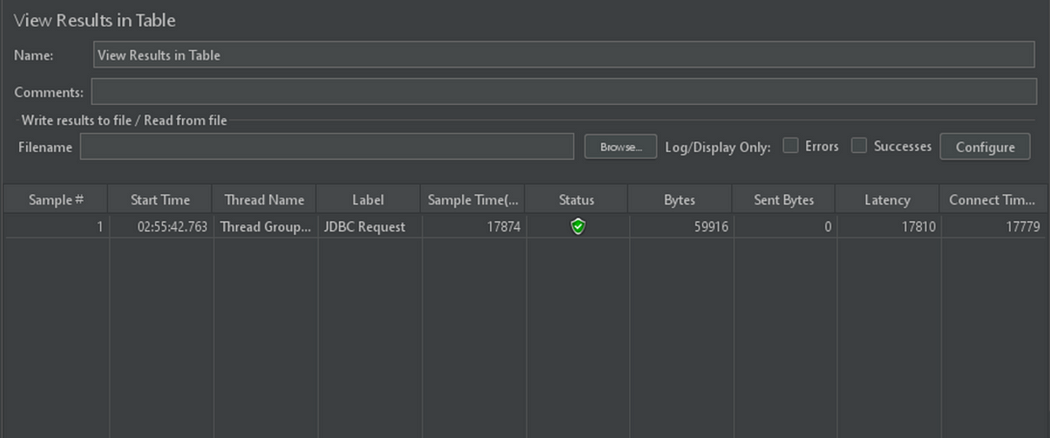
View Results in Table: Displays detailed results of sampler requests in a tabular format.
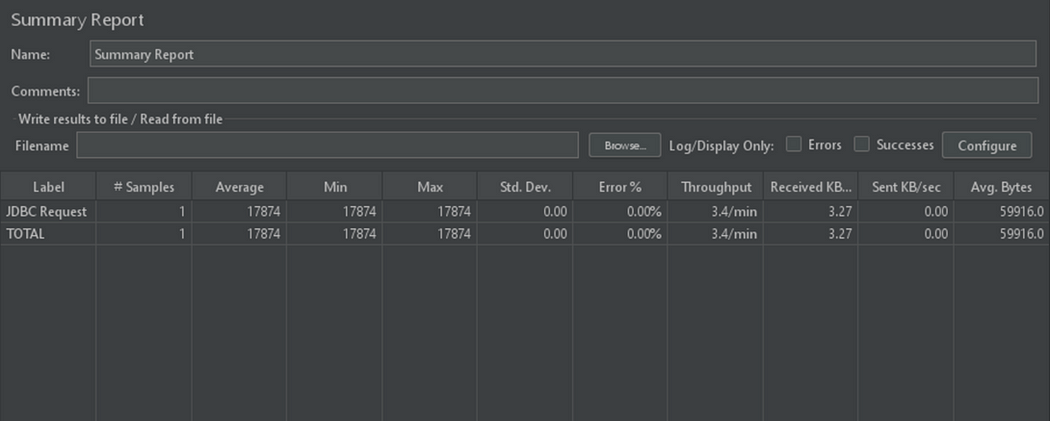
Summary Report: Provides an overview of test results including key metrics like average response time and error rate.
Assertion Results: Indicates whether sampler responses meet specified criteria, helping to verify the correctness of server responses.
Step 8: Running the test
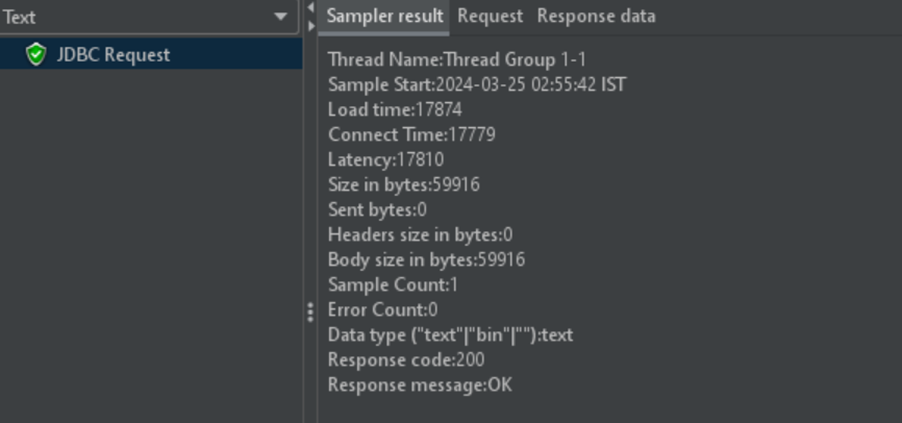
Click the Play button at the top to execute the JDBC request and view the result via added listeners.
Step 9: Update the user count

Go to Thread Group and locate the field or parameter where you specify the number of users (often labeled as “Number of Threads” or “Users”).
Modify User Count: Change the value in the field to the desired number of users you want to simulate.
Save Changes: Save your test plan to retain the modifications.
Run Test: Execute your test plan to simulate the new number of users and observe the results.
Conclusion:
Preparing for database performance testing is crucial to ensure the smooth functioning of applications reliant on the database. By setting up the testing environment and comprehending the database structure and queries it handles, we can proactively identify and resolve any issues before they affect users. Through proper preparation, we can guarantee that our applications operate seamlessly, resulting in satisfied users and successful outcomes.


